EDIT 22/Dec/2016: there is s a new version of this article at https://blog.kodono.info/wordpress/2016/12/22/2-bypass-a-lookup-field-not-displayed-because-of-threshold-on-newform-and-editform-sharepoint-2013/
Sharepoint is really annoying to limit the access to the list with more than 5,000 items… It causes many troubles, and one of them is when you use a lookup field into a form that is tied to a big list. Sharepoint will not display the field/dropdown but will show the message:
This is a lookup column that displays data from another list that currently exceeds the List View Threshold defined by the administrator
There is a solution to bypass this problem and show our lookup dropdowns.
You need:
- jQuery
- Sharepoint
- And I use Chosen to have a better dropdown
I’ll show how I did it for the EditForm.
First, copy/paste the below JavaScript code into a file that you’ll store somewhere on your Sharepoint:
// load jQuery, SharepointPlus and Chosen
var toLoad = '<script src="/Toolbox/Documents/js/jQuery/jquery-1.12.3.min.js"></script>'
           + '<script src="/Toolbox/Documents/js/SharepointPlus/3.13/sharepointplus-3.13.min.js"></script>'
           + '<link href="/Toolbox/Documents/js/Chosen/1.5.0/chosen.min.css" rel="stylesheet" type="text/css">'
           + '<script src="/Toolbox/Documents/js/Chosen/1.5.0/chosen.jquery.min.js"></script>'
document.write(toLoad);

(function() {
  var aDeferred=[];
  var modal;
  // list the fields we want to fix
  // /!\ Add here the Field ID of the fields that need to be fixed
  var lookupFieldsToFix = ["Voucher_x0020_Code", "User_x0020_Name"];
  // /!\ Specify the name of the related list, as well as the Column to retrieve
  var configurationsLookup = [{list:"Vouchers", field:"Title"}, {list:"Users", field:"Name"}];

  // this function is triggered once the form is loaded
  function allLoaded(ctx) {
    // delete all existing localStorage
    localStorage.removeItem('RequestsLookup')
    // check if our call to lists are done
    $.when.apply(this, aDeferred).done(function() {
      var save={}, count=0, i;
      for (i=arguments.length; i--;) {
        if (arguments[i]) {
          save[arguments[i].field] = arguments[i].choices; // save it as {fieldName:choices}
          count++;
        }
      }
      if (count > 0) {
        // we use localStorage
        localStorage.setItem('RequestsLookup', JSON.stringify(save));
        // now reload the page
        $SP().closeModalDialog();
        $('#aspnetForm').hide().after('<h1>Reloading...</h1>');
        window.location.reload();
      } else {
        // we use Chosen
        for (i=lookupFieldsToFix.length; i--;) {
          var e=WPQ2FormCtx.ListSchema[lookupFieldsToFix[i]];
          $(document.getElementById(e.Name+"_"+e.Id+"_$"+e.FieldType+"Field")).chosen({search_contains:true});
        }
        // and on Exam Name
        $SP().formfields("Exam Name").elem().chosen({search_contains:true});
      }
    })
  }

  /**
   * Fix the broken lookup fields
   * @param  {String} field Name of the field to fix
   * @return {Deferred}
   */
  function fixLookup(field) {
    var deferred = jQuery.Deferred();
    var saved, choices=[], config;

    // we check if there is a Throttled
    if (WPQ2FormCtx.ListSchema[field].Throttled) {
      WPQ2FormCtx.ListSchema[field].Throttled=false;
      // check if we have a localStorage, if yes it means we are after the reload
      saved = localStorage.getItem("RequestsLookup");
      if (saved !== null) {
        saved = JSON.parse(saved);
        // we use the stored data to create our dropdown
        WPQ2FormCtx.ListSchema[field].ChoiceCount=saved[field].length;
        WPQ2FormCtx.ListSchema[field].Choices=saved[field];
        deferred.resolve();
      } else {
        WPQ2FormCtx.ListSchema[field].ChoiceCount=0;
        WPQ2FormCtx.ListSchema[field].Choices=[];
        // then we show a Waiting message
        if (!modal) {
          modal=true;
          $SP().waitModalDialog("Loading some data...");
        }
        // and we get data from the list
        config = configurationsLookup[SPArrayIndexOf(lookupFieldsToFix, field)];
        if (config.list) {
          $SP().list(config.list).get({fields:config.field, paging:true}, function(data) {
            var res=[];
            for (var i=data.length; i--;) {
              res.push({LookupId:data[i].getAttribute("ID"), LookupValue:data[i].getAttribute(config.field)});
            }
            deferred.resolve({field:field, choices:res});
          });
        } else deferred.resolve([]);
      }

    } else deferred.resolve();
    return deferred;
  }

  // do some actions as soon as the fields are shown
  var changeForm = {
    Templates: {
      OnPreRender:function(ctx) {
        // we want to show Voucher Code and User Name even if there are more than 5000 items in those lists
        if (SPArrayIndexOf(lookupFieldsToFix, ctx.ListSchema.Field[0].Name) > -1) {
          aDeferred.push(fixLookup(ctx.ListSchema.Field[0].Name));
        }
      },
      OnPostRender:function(ctx) {
        // only trigger when everything is loaded
        if (ctx.ListSchema.Field[0].Name === "Attachments") {
          allLoaded(ctx)
        }
      }
    }
  }
  // don't do it when editing the page
  if (GetUrlKeyValue("PageView") !== "Shared") SPClientTemplates.TemplateManager.RegisterTemplateOverrides(changeForm);
})();
Please refer to the /!\ symbol to configure two variables: only lookupFieldsToFix and configurationsLookup need to be set by you.
Note that the above code is compatible for IE8+, and all modern browsers.
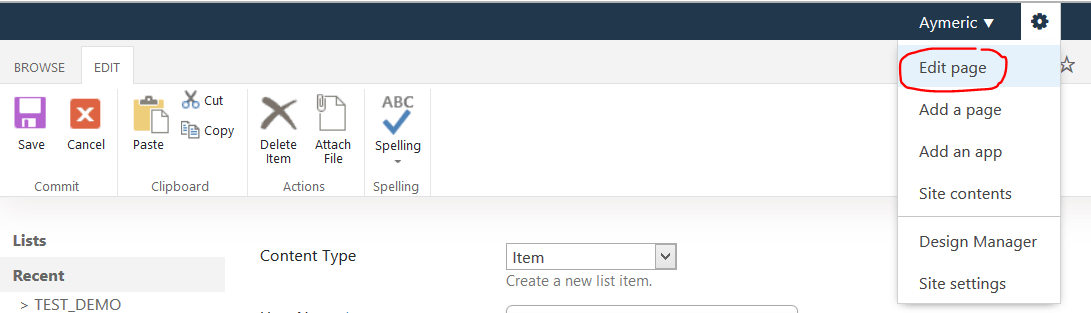
Now go to the EditForm.aspx of your list. Then edit the page:
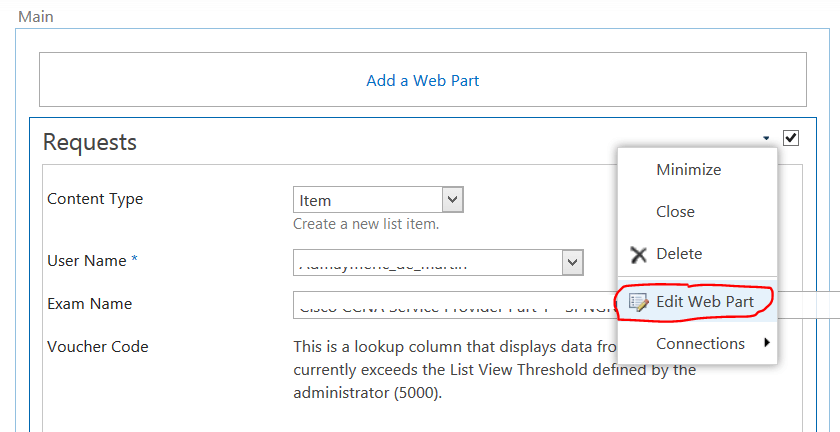
Next, edit the webpart settings:
Go to the Miscellaneous section and enter the path to your JavaScript file (created before) in the JS Link field – you can use ~site in the path:

Finally click ON, and then on Stop Editing in the ribbon.
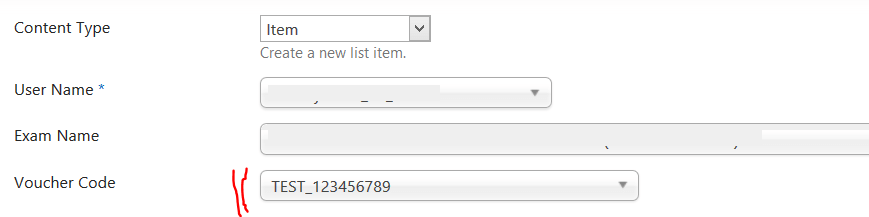
You can now try to edit an item and the lookup fields should be fixed. Example:
NOTE
The document.write() is not really a good practice because it will delay the page load. It would be better to load asyn the JS using this tiny function. In that case you need to make sure to have only Vanilla JS in your changeForm.