Facebook change régulièrement les paramètres de postage de vos statuts sur Facebook en en changeant la portée.
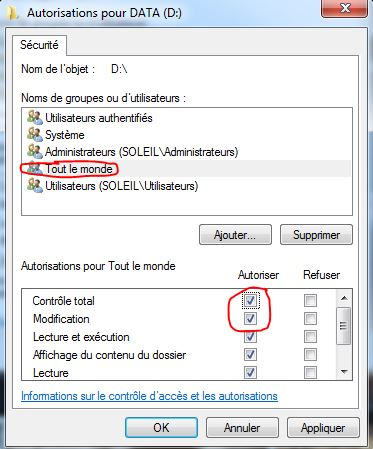
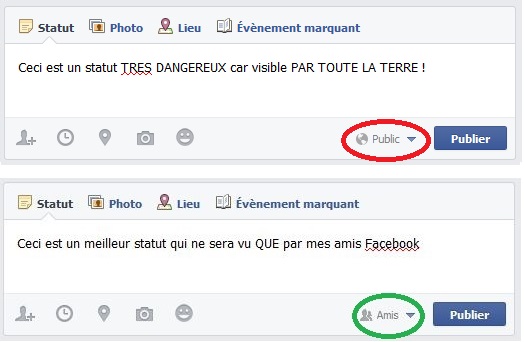
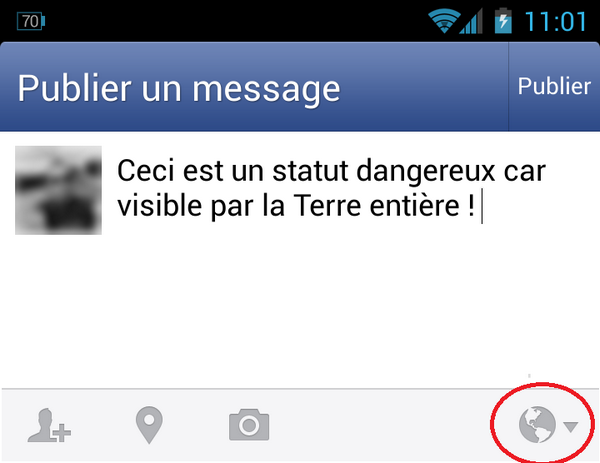
Il est facile de s’en rendre compte. Lorsque vous postez un message et que la planète Terre apparait en bas à droite c’est que la Terre entière peut voir votre message, et pas seulement vos amis. Donc si vous voyez l’image ci-dessous, c’est très mauvais :

D’autant que ça ne concerne pas seulement vous, mais vos amis aussi, puisque s’ils aiment ou commentent ce statut/photo/lien alors tous leurs amis, et n’importe qui d’autre, pourront voir qu’ils ont aimé ou commenté. Peut-être que votre pote n’a pas envie que sa mère voit qu’il a écrit une grosse connerie dans votre statut à vous…
Quoi faire alors ?
C’est très simple. Il y a deux choses principales à faire.
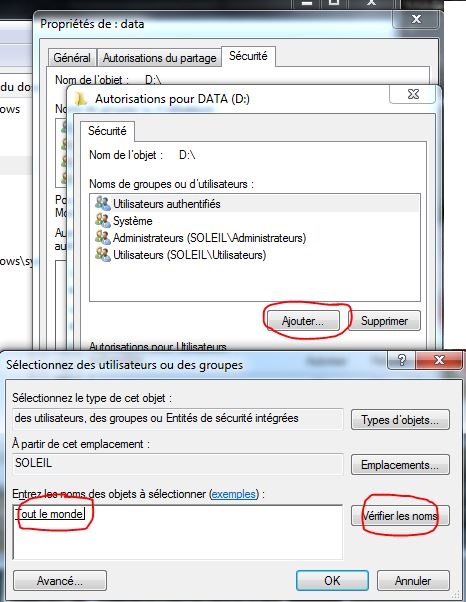
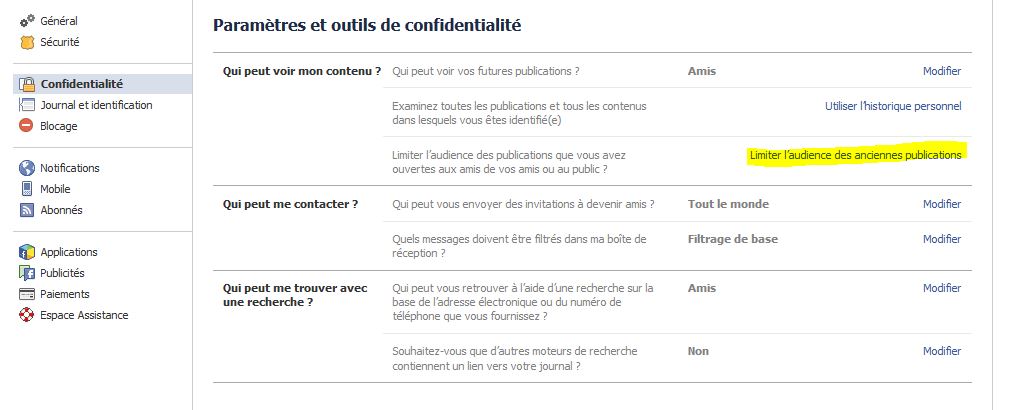
Tout d’abord, il faut se rendre dans ses paramètres Facebook, partie Confidentialité et modifier qui peut voir ses statuts :
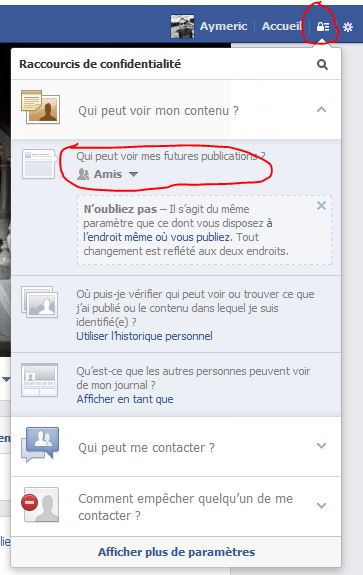
Au minima, vous devez sélectionner “Amis” qui indiquent que seuls vos amis Facebook voient vos publications.
La deuxième chose à faire est de vérifier qu’à chaque fois que vous postez quelque chose, c’est bien le logo “Amis” et non “Planète Terre” qui apparait en bas à droite :
C’est d’autant plus vrai sur le téléphone portable où les applications iPhone/Android ont tendance à passer toutes seules en mode “public” ! Le principe est le même :
Et voilà, c’est tout.
Mais on peut aller encore plus loin dans votre vie privée et surtout celle de vos amis.
Par exemple il est possible de changer l’audience de nos anciennes publications. C’est particulièrement pratique si vous postez en “Public” depuis des mois sans vous en rendre compte. Pour ce faire, il suffit d’aller dans vos paramètres de confidentialité puis de cliquer sur “Limiter l’audience des anciennes publications” et de suivre les instructions :
Mais on peut aller encore plus loin ; en créant des listes d’amis !
Vous souhaitez surement que vos messages ne soient visibles QUE pour une partie de vos amis Facebook. Pour cela vous pouvez créer des listes (= groupes) d’amis. Par exemple vous pouvez faire un groupe “Ma famille”, un groupe “Mon travail” et un groupe “Mes potes”. Ainsi quand vous postez un message, une photo ou un lien, vous ne voulez peut-être pas que cette publication soit visible par votre famille ou votre travail, du coup vous pouvez sélectionner le groupe “Potes” et seuls eux la verront.
Comment procéder ?
Il faut retourner dans votre fil d’actualité de vos amis. Sur la gauche vous avez une barre avec “Favoris”, “Pages”, “Applications”, etc. Puis une section “Amis”. Si vous bougez votre souris vers “Amis” vous verrez apparaitre un “Plus” comme ci-dessous, sur lequel vous devez cliquer :
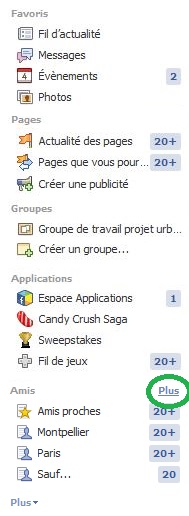
Là vous verrez une liste de groupes d’amis que Facebook a créé de façon automatique. Je vous déconseille de les utiliser et je vous invite plutôt à cliquer sur le bouton “Créer une liste” et à y ajouter ceux qui doivent s’y trouver. On peut reprendre l’exemple d’avant avec une liste “Ma famille”, “Mon travail” et “Mes potes”.
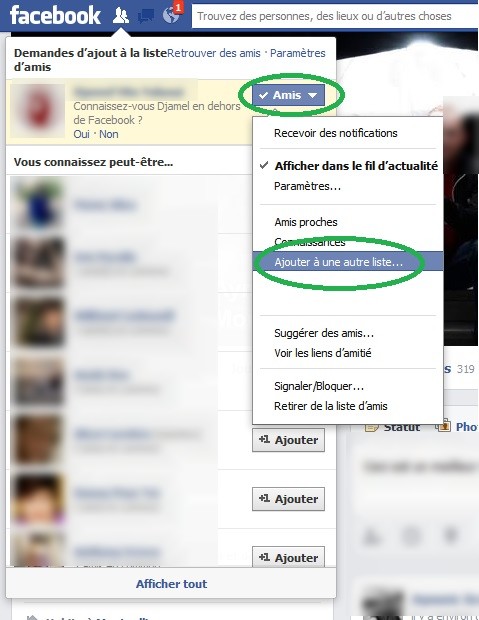
Il faudra cependant ajouter les nouveaux amis dans un de ces groupes. C’est particulièrement simple puisqu’une fois l’ami accepté il suffit de cliquer sur le bouton “Amis” qui apparait à droite du profil (c’est valable de PARTOUT dans Facebook où ce bouton apparait) et de choisir de l’ajouter à une autre liste :
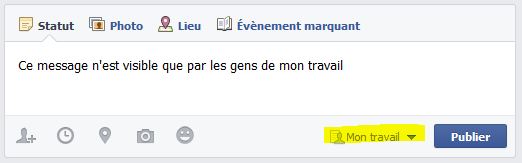
Et lorsque vous posterez, il faut cliquer sur l’audience (l’icône que l’on a vu précédemment pour passer de “public” à “amis”) et choisir la liste que l’on désire. Le rendu sera alors :
Il est également possible de “personnaliser” une publication. Par exemple c’est utile si vous voulez que vos potes ET votre famille le voit, mais pas votre travail, ou alors si vous voulez limiter à quelques personnes seulement. Le principe est identique : avant de poster il faut cliquer sur l’audience et choisir “Personnaliser” :
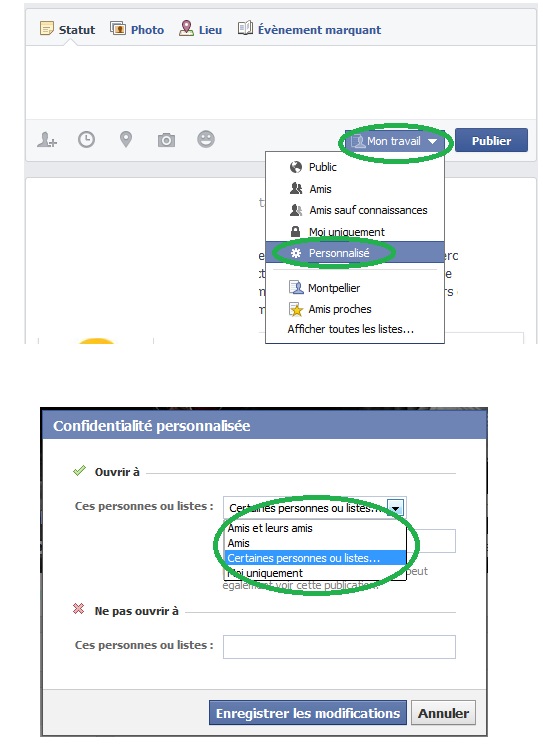
De là vous pouvez inclure une liste et exclure une personne de cette liste. Par exemple vous voulez que votre famille le voit, mais pas votre grand mère. Ainsi vous mettez “Ma famille” dans les gens qui verront la publication, et vous mettez “Mamie” dans les gens à exclure.
ATTENTION
A noter que Facebook enregistre la dernière audience et l’utilise pour les prochaines publications ! Donc si vous sélectionnez “Mon Travail” depuis votre ordinateur à un moment pour partager un lien sérieux, puis que du téléphone vous postez une photo de vous entrain de faire la fête, alors Facebook utilise automatiquement la dernière audience choisie, c’est-à-dire “Mon Travail” !! D’où l’importance de bien vérifier à chaque fois l’audience qui est sélectionnée.